Intoximeters recommends that external accuracy checks and calibrations be performed using either a dry gas or wet bath standard approved for use by both NHTSA and Intoximeters. (Wet bath simulators would be used with properly certified and maintained ethanol solutions).
In all cases the compressed gas tanks, simulators and simulator solutions should be used and maintained only in accordance with the quality assurance plans provided by their respective manufacturers to insure that they produce consistent and reliable samples.
Approved Wet Bath Simulator (Standard)
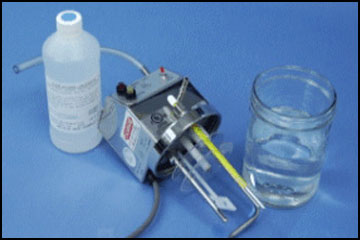
An Alcohol Breath Simulator (used in conjunction with a known Simulator Solution Standard) is a thermostatically controlled, water-alcohol instrument for the purpose of providing a precise vapor calibration standard for checking the accuracy and calibrating breath alcohol analyzers.
ELEMENTS:
- Glass jar which holds 500cc of solution.
- Jar head contains heater thermostat, stirrer, thermometer, and inlet and outlet ports for sampling headspace gas standing above the solution.
- Solution is a water/alcohol mixture of a certified BrAC/BAC concentration.
GENERAL INFORMATION:
- Solution has a seven-month shelf life for refrigerated, unopened bottles of solution, or as determined by the manufacturer.
- 25-30 tests per bottle of solution.
- Liquid should be clear with no visible particles suspended in the solution.
- A simulator containing a solution of known BrAC/BAC value must be at the operating temperature of 34°C, + .2°C, before use.
- The simulator top must be on securely so the system is airtight. To check, cover the outlet port and blow into the intake port. Air bubbles will not rise through the solution if the top is secure.
- When in use keep the simulator out of extreme cold or hot environments. Also, keep it out of drafty locations.
OPERATING GUIDELINES:
- Attach tubing to the inlet port.
- Remove the glass container from the simulator top housing. Make sure all parts are clean and dry. (To prevent breakage, do not strike the thermostat or mercury thermometer against the glass container).
- Pour certified simulator solution to the 500 ml mark on the glass container. (DO NOT OVER FILL).
- Reassemble the simulator by replacing the container into the top housing; be sure the container is properly seated to the top housing. (DO NOT OVER TIGHTEN).
- Plug simulator into electric outlet. Turn the power ON and allow the solution to heat to 34°C. This will require approximately 30 minutes. The heater lamp is lit when the heating element is heating. The heater lamp is OFF when the simulator has reached the proper temperature of 34°C. (It is normal for the heater lamp to rapidly turn on and off as the instrument cycles.) Once the heater lamp turns OFF, wait an additional 15-30 minutes prior to testing.
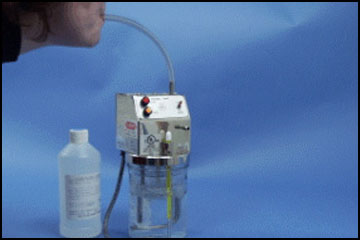
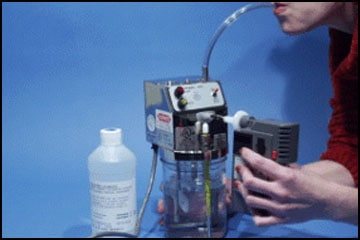
- Observe the reference thermometer to verify the simulator has reached the proper operating temperature. Blow a sample into the inlet port to purge the initial headspace.
- The simulator is ready for use. A new mouthpiece should be attached/inserted to instrument and then this assembly should be attached to the outlet port on the front of the simulator.
- The connection from the outlet port of the simulator and the instrument should always be as short as possible. Long tubes will collect condensation and can effect the stability of a provided sample.
- When the simulator is not in use, connect the inlet tube to the outlet port to seal the simulator to avoid loss of alcohol from the solution.
|
 |
 |
 |
 |
Note: Always check the temperature of the simulator before use. Producing the proper expected alcohol concentration is dependent upon the simulator being heated to 34°C, + .2°C. Additionally, only use current simulator solution from an accredited supplier.
(CAUTION: DO NOT remove the top housing and expose the heating element to room air with the power turned ON. This will result in damage to the heating element).