Alco-Sensor FST Calibration Procedure
Prior to calibrating an Intoximeters breath alcohol testing instrument, you should be trained to perform the calibration functions as allowed under your specific testing program. The calibration procedures below are designed to help you ensure precise and accurate test results. If, according to your program, you are not authorized to perform calibrations, please see your program administrator or contact Intoximeters for assistance. Typically, a calibration is not required if the results of accuracy checks are within the programs acceptable tolerance.
The procedure for calibrating an Intoximeters breath alcohol testing device will vary based on instrument model and type. Refer to the Operator’s Manual of your instrument for specific instructions on calibrating your device. DO NOT perform this procedure unless you are authorized to do so.
Below are basic calibration instructions for the Intoximeters Alco-Sensor FST breath testing instrument. Unless your testing procedure dictates otherwise, a calibration is only necessary if an accuracy check has proven the instrument to be out of tolerance. Some users choose to calibrate the instrument more frequently to ensure that the instrument remains within tighter tolerances than required by their quality assurance plan and this process will not damage the instrument.To calibrate an Alco-Sensor FST, the unit temperature must be between 15ºC – 35ºC. If the temperature is not within this range, the unit will display E09 or E10 and block the calibration procedure. (Note: An ASFST standard software requires a calibration alcohol standard concentration between .015 – .200).
Tools Required: Before beginning have items available: instrument, calibration standard, new mouthpiece, calibration logbook
Alco-Sensor FST Calibration Procedure Part 1
|
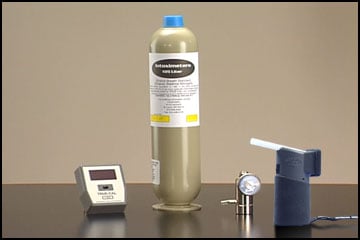 |
Note: A calibration standard can be a:
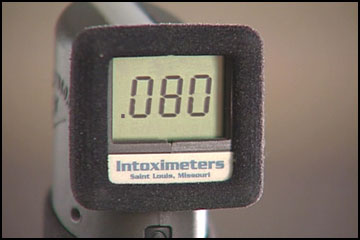
For this demonstration, a dry gas cylinder is used as the standard – value (at sea level) of.082%. A True-Cal device was used to give the true value of the standard at the time of our demonstration – the True-Cal will adjust the expected gas value for the current atmospheric pressure. Therefore, the target value for this demonstration is .080 |
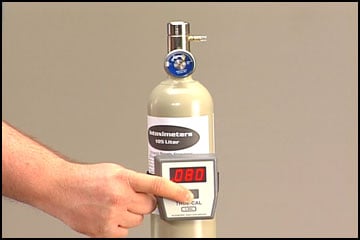 True-Cal displays .080 True-Cal displays .080 |
|
Pre Operation Checklist
|
|
Alco-Sensor FST Calibration Procedure Part 2
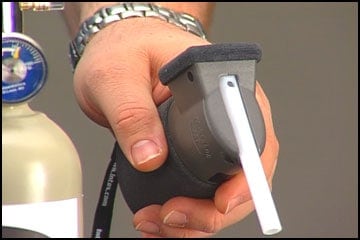
| 1) Attach a new mouthpiece then press and hold the OFF button while simultaneously pressing the ON button. |  |
| 2) The display should show the rcL message (this is the first option in the function Menu)
Note: After gaining access to the instrument menu indicated by rcL being displayed – pressing the ON button will allow you to scroll through the list of available options – rcL, PAS, rbL, ACC, CAL, dSr. Pressing the OFF button will execute or select the option displayed at the time the OFF button is pressed. |
 |
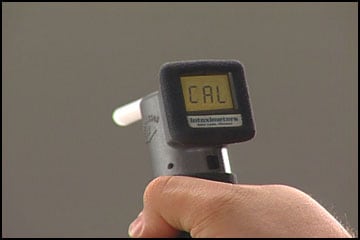
| 3) Momentarily depress the ON button until the displayed message changes to CAL.
|
|
| 4) With CAL on the display, press the OFF button to initiate the Calibration sequence. The unit temperature will be displayed – if it is within the proper range for a Calibration a flashing CAL message will be displayed on the instrument.(Reminder: 15ºC to 35ºC is the allowable temperature range for performing calibrations) |  |
Alco-Sensor FST Calibration Procedure Part 3
| 5) While the display shows a flashing CAL, make an airtight connection between the delivery tube of the regulator and the open end of the mouthpieces. | 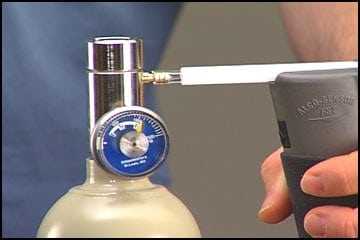 |
| 6) Depress the regulator control button. When there is a continuous airflow – 6 liters per minute for four seconds – the instrument should capture a sample automatically. Make certain that the gas continues to flow for 1-2 seconds after the sample is captured. (Sample collection is identified by a clicking sound.)
(Note: If for some reason you cannot provide an adequate flow rate for the instrument to collect an automatic sample, it is possible to perform an Accuracy Check by taking a manual sample. To perform an Accuracy Check in this manner, depress the regulator control button and have the gas flowing to the instrument for seven seconds. On the 5th second depress the ON button to take a manual sample. Make certain that the gas continues to flow for 1-2 seconds after the sample is taken.)
|
|
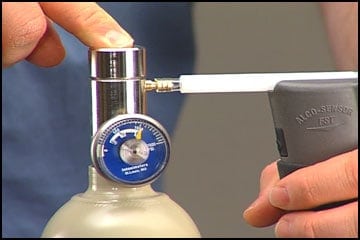
| 7) Detach the mouthpiece from the regulator.
8) Observe the result and compare it to the known value of the Standard gas. If the value displayed is the same as the value of the standard you are using your unit is calibrated. Depress the OFF button three times, the value displayed will be accepted as the Calibration Value and will flash three times before the instrument will power down. |
 |
| Note : If the displayed result does not match the expected value or current target of the standard gas, you will need to adjust the displayed result to the proper value. The result displayed will have the digit furthest to the left flashing. If the flashing digit is incorrect, press and release the ON button as many times as it is necessary to cycle the displayed digit to the correct number. When the digit is correct, press the OFF button to move the flashing highlight to a digit to the right. After you have adjusted the furthest digit to the right, and the OFFbutton is depressed, the new calibration value will be flashed on the display three times. If you need to adjust this number again, pressing the OFF button again while the entire calibration number is flashing will provide you with this option (the furthest digit to the left will be flashing). View Animation |
 |
| 9) Record the results in your calibration log book. | 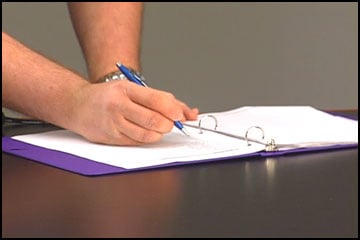 |
| 10) It is essential to verify the calibration. Always use a new mouthpiece and an approved gas standard. THE RESULT OF THE ACCURACY CHECK FOLLOWING A CALIBRATION SHOULD BE WITHIN ±.003 OF THE EXPECTED VALUE OF THE STANDARD GAS READING. |
| 11) Attach a new mouthpiece then press and hold the OFF button while simultaneously pressing the ON button. (Follow the Accuracy Check procedure.) |
| 12) Observe the result and compare it to the known value of the Standard gas. If the result of the Accuracy Check following a Calibration does not produce a result within ±.003 of the standards target value you will need to perform another Calibration procedure followed by a post-calibration accuracy check.
13) Record the result. |
To demonstrate compliance with your program’s QAP it is best to keep a record or a Calibration Log for each device used for testing. The log should contain the results of all accuracy checks and calibrations for each instrument. This log may become a crucial piece of evidence should your test results be challenged. The log may include information such as:
- Date
- Time
- Procedure performed (Accuracy Check or Calibration)
- Name of Technician performing procedure
- Location
- Identification of the Standard including Lot Number of the Standard
- Expected Value of the Standard
- Result of the Accuracy Check or Calibration
For more information about procedures for your Intoximeters instrument, please refer to your
- Operator’s Manual
- or email Intoximeters Tech Support
- or phone the Technical Support Department at (314) 429-4000