Alco-Sensor III Calibration Procedure
Below are basic calibration instructions for the Intoximeters Alco-Sensor III breath testing instrument.
Tools Required: Before beginning have these items available: instrument, calibration standard, new mouthpiece, non-metallic screwdriver.
Alco-Sensor III Calibration Procedure Part 1
|
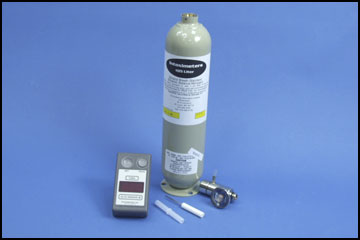 |
Note: A calibration standard can be a:
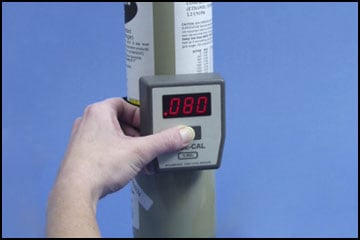
For this demonstration, a dry gas cylinder is used as the standard –value (at sea level) of .082%. a True-Cal Device was used to give the true value of the standard at the time of our demonstration – the True-Cal will adjust the expected gas value for the current atmospheric pressure. Therefore, the target value for this demonstration is .080. When to Perform a Calibration A calibration procedure should be performed when the result of an accuracy check indicates the unit does not read a standard within your testing program`s specified acceptable tolerance. |
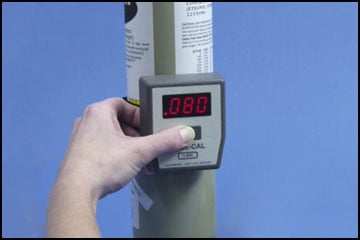 True-Cal displays .080 True-Cal displays .080 |
Alco-Sensor III Calibration Procedure Part 2
| Prior to calibrating it is critical that you know the expected value of the calibration standard you are using. (The value of the standard will be found on the label on the Mini-Alco Can, Dry Gas Cylinder, True-Cal device (see previous picture) or Bottle of Wet Bath Simulator Solution). | |
| Check Instrument Temperature Make certain that the instrument temperature is between 20°C and 40°C. If not, warm or cool the instrument until it is within this range. |  Temperature window Temperature window |
| Alco-Sensor III Displays .000 – Pre-Calibration “Blank”1) Depress read button, .000 should be seen for at least 5 to 10 seconds.
If .000 is not seen, depress set button and recheck in one minute. (The unit must display .000 for 5 to 10 seconds before proceeding.)
|
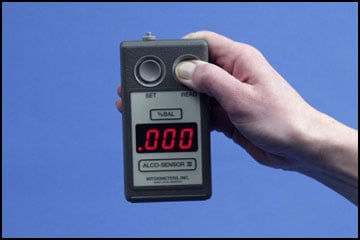 READ button depressed ASIII displays .000 READ button depressed ASIII displays .000
|
| 2) Follow instructions on the dry gas standard to mount the regulator.3) If this is the first test from the dry gas standard today, purge regulator by depressing button/valve on regulator for approximately 3 to 4 seconds.
|
 Set button depressed Set button depressed
|
| 4) Insert screwdriver in calibration screw hole located on right side of unit. | 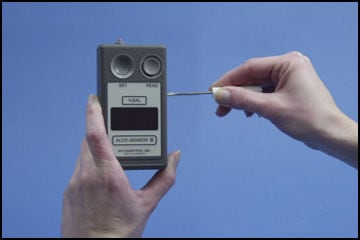 |
| 5) Turn screw one or two revolutions clockwise to over sensitize the instrument. | |
Alco-Sensor III Calibration Procedure Part 3
| 6) Attach new dry mouthpiece to Alco-Sensor III. | 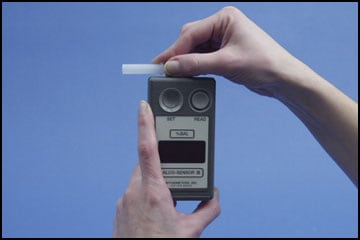 |
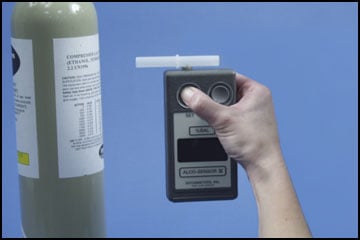
| 7) Attach Alco-Sensor III mouthpiece to the calibration device gas out port. (Make certain there is a good seal between the connector and the mouthpiece). | 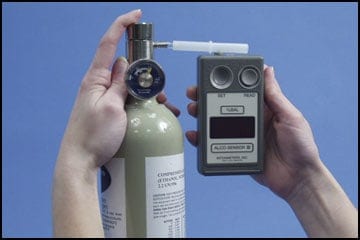 |
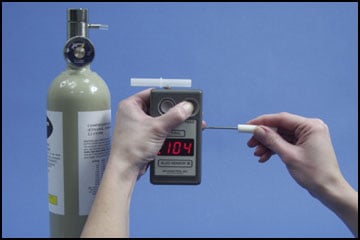
| 8) If you are using a dry gas standard, depress the button on the regulator for 6 seconds. (If you are using a Wet Bath Simulator & Solution for a standard, you should blow into the inlet port of the simulator for at least six seconds). Using either type of standard, on the 4th or 5th second of the 6 second count, press the read button.(NOTE: The gas/vapor must be flowing through the mouthpiece when the read button is depressed and it is suggested that it flow for at least one second after the READ button has been depressed). | Regulator button depressed
READ button is depressed – reading is beginning to climb
|
Alco-Sensor III Calibration Procedure Part 4
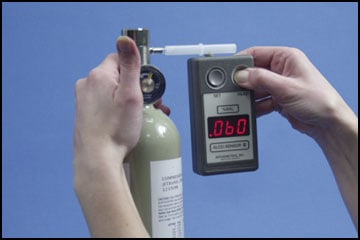
| 9) Carefully detach the Alco-Sensor III from the calibration assembly and place the screwdriver on the calibration screw.10) Observe the reading on the Alco-Sensor III. You will have approximately 5-10 seconds to complete this step.
When the reading has surpassed the target value of the calibration standard, immediately turn the calibration screw counterclockwise until the target valueand the reading on the Alco-Sensor III are the same. Repeat this step to keep the target value the same as the calibration standard. Never adjust the target value below the calibration standard value and never turn the screw clockwise to raise the target value to meet the calibration standard value. If you do over adjust stop turning the calibration screw and wait to see if the target value naturally rises back to or above calibration standard value. If it does then you may continue turning the counterclockwise to keep the target value and the calibration standard values the same. If the target value never naturally rises back above or equal to the calibration standard you will need to restart the calibration process from Step 1. When the reading on the Alco-Sensor III and the target value of the calibration standard are the same and remain constant for 5 seconds, the calibration process is complete.
|
 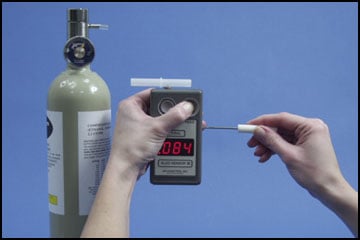
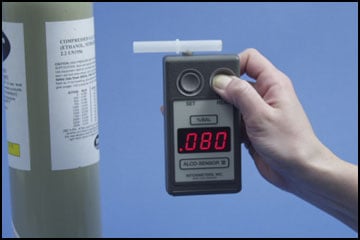
Observe final reading Target value of the standard used for this demonstration was .080%, the instrument is calibrated.
|
| 11) Once you have completed Step 10 depress the set button.12) It is essential to verify the calibration. Wait 3 minutes, then run an accuracy check using a new dry mouthpiece and a calibration standard.
Follow the step by step instructions in the Post Calibration Accuracy Check.
|
 SET button depressed SET button depressed |
To demonstrate compliance with your program’s QAP (Quality Assurance Plan) it is best to keep a record or a Calibration Log for each device used for testing. The log should contain the results of all accuracy checks and calibrations for each instrument. This log may become a crucial piece of evidence should your test results be challenged. The log may include information such as:
- Date
- Time
- Procedure performed (Accuracy Check or Calibration)
- Name of Technician performing procedure
- Location
- Identification of the Standard including Lot Number of the Standard
- Expected Value of the Standard
- Result of the Accuracy Check or Calibration
For more information about procedures for your Intoximeters instrument, please refer to your
- Operator’s Manual
- or email Intoximeters for Technical Support
- or phone the Technical Support Department at 314.429.4000