
Alco-Sensor IV Calibration Procedure
Prior to calibrating an Intoximeters breath alcohol testing instrument, you should be trained to perform the calibration functions as allowed under your specific testing program. The calibration procedures below are designed to help you ensure precise and accurate test results. If according to your program you are not authorized to perform calibrations, please see your program administrator or contact Intoximeters for assistance. Typically, a calibration is not required if the results of accuracy checks are within the programs acceptable tolerance.
The procedure for calibrating an Intoximeters breath alcohol testing device will vary based on instrument model and type. Refer to the Operator’s Manual for your instrument for specific instructions on calibrating your device. DO NOT perform this procedure unless you are authorized to do so.
Getting Started
Below are basic calibration instructions for the Intoximeters Alco-Sensor IV breath testing instrument. Unless your testing procedure dictates otherwise, a calibration is only necessary if a accuracy check has proven the instrument to be out of tolerance. Some users choose to calibrate the instrument more frequently to ensure that the instrument remains within tighter tolerances than required by their quality assurance plan and this process will not damage the instrument.
Tools Required: Before beginning have items available: instrument, calibration standard, new mouthpiece, calibration tool
Alco-Sensor IV Calibration Procedure Part 1
|
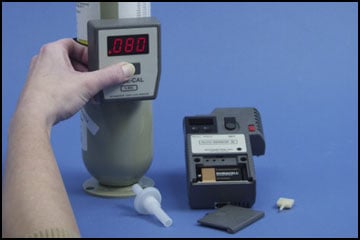 |
For this demonstration, a dry gas cylinder is used as the standard –value (at sea level) of .082%. a True-Cal Device was used to give the true value of the standard at the time of our demonstration – the True-Cal will adjust the expected gas value for the current atmospheric pressure. Therefore, the target value for this demonstration is .080. |
|
Alco-Sensor IV Calibration Procedure Part 2
|
|
|
 Mouthpiece inserted and temperature displayed Mouthpiece inserted and temperature displayed |
|
|
|
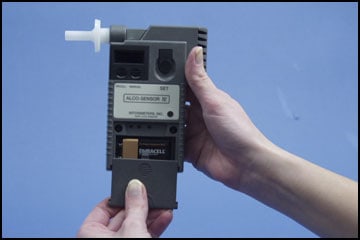 Battery cover removed Battery cover removed |
|
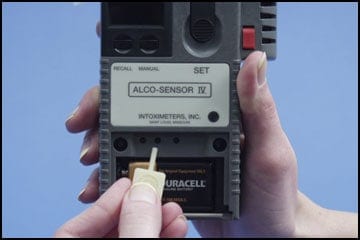 Calibration Switches with Cal Tool Calibration Switches with Cal Tool |
Alco-Sensor IV Calibration Procedure Part 3
| 1) To begin the Calibration, gently press Switch #1 and hold it down with calibration tool.2) While the calibration tool is pressed in Switch #1, insert the mouthpiece. Inserting the mouthpiece turns the unit ON.
Four red squares should appear on the display. If they do not, remove the mouthpiece and start the process again. 3) If “Set” displays at any time during the calibration procedure, press the SET button, then proceed.
|
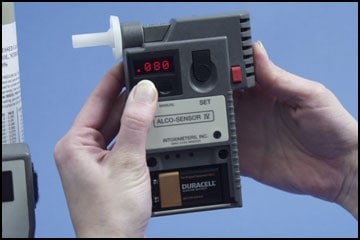
 Four red squares displayed Four red squares displayed |
| 4) After the mouthpiece is inserted, take the calibration tool out of Switch #1 then press and hold the tool on the far right Switch (Switch #3). While the tool is depressing Switch #3, an automatic air blank will occur, followed by .000 indicating the instrument is alcohol-free prior to the calibration.Keep the tool gently pressed down in Switch #3 until the .000 is replaced with a different number. |
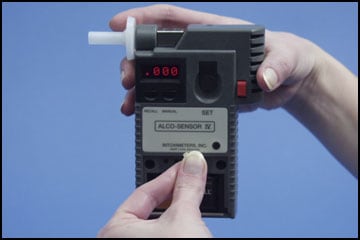 .000 displayed – cal tool in Switch #3 .000 displayed – cal tool in Switch #3
|
| 5) Observe the number displayed and remove the tool from Switch #3. The reading displayed represents the last calibration setting. In the picture you can see that the last calibration value was .100. | 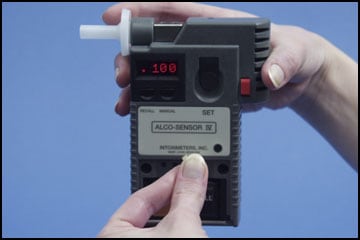 Last calibration value displayed Last calibration value displayed
|
| 6) In this example we are calibrating the instrument with a dry gas standard that has a current expected value of .080. In order to calibrate the instrument to this level, we will need to adjust the number displayed so that it matches the current expected value of the calibration standard. Adjust the calibration reading to match the standard you are using by pressing the tool into the Switch #1 (increments up) and Switch #2 (increments down) as needed. When the number on the display matches the current expected value of your standard, press Switch #3. This will indicate to the instrument that in this scenario it is about to be calibrated with a gas standard with a value of .080.7) Once Switch #3 has been pressed “Cal” will flash on the display indicating that the instrument is ready to accept the standard sample. |
 Current expected value – .080  Current expected value – .080 |
Alco-Sensor IV Calibration Procedure Part 4
| 8) When using a dry gas standard for calibration or accuracy checks on an Alco-Sensor IV, purge the gas tanks valve and regulator for several seconds prior to introducing the gas to the Alco-Sensor IV. After the purging process, attach regulator to the Alco-Sensor IV mouthpiece. Make sure there is a good tight connection between the regulator and mouthpiece. | 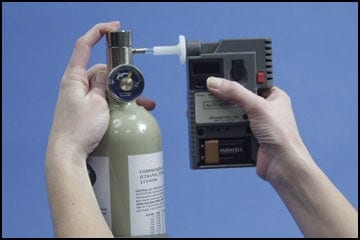 |
| 9) On the fourth (4th) or fifth (5th) of the six (6) seconds, press the MANUAL button on the Alco-Sensor IV to collect a gas sample for analysis. Do not stop stop the flow of the gas sample until after the MANUAL button has been pressedand flashing arrows “< > <” appear on the Alco-Sensor IV display.(Note: The dislay must flash cal before the standard gas sample is delivered).
|
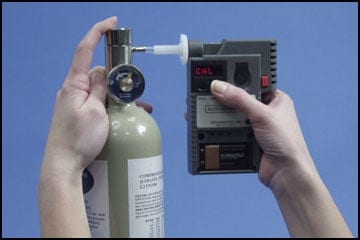 |
| 10) Flashing arrows “< > <” on the display indicate the Alco-Sensor IV is analyzing the sample. DO NOT press any buttons on the Alco-Sensor IV while the flashing arrows are displayed. | 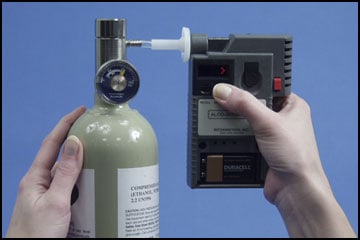 |
| Note: The resulting calibration value will reflect the programmed value set in the Alco-Sensor IV | 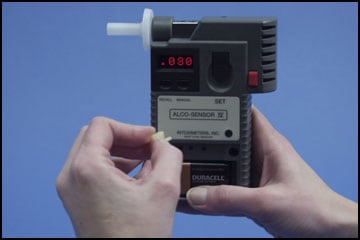 |
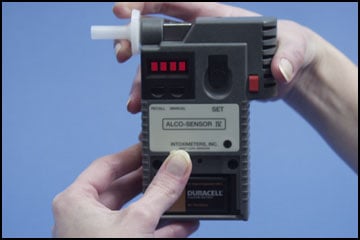
| 11) Observe the three-digit calibration reading. This reading will match exactly the value you set into the Alco-Sensor IV. This reading indicates the Alco-Sensor IV has been calibrated.(A post test accuracy check should be run to verify that the calibration adjustment has been successful.)
|
 Calibration Reading (Matches value set into ASIV) Calibration Reading (Matches value set into ASIV)
|
| 12) When “Set” displays, depress the SET button on the Alco-Sensor IV.13) Record the calibration reading in your Calibration Log.
|
 Set button depressed Set button depressed
|
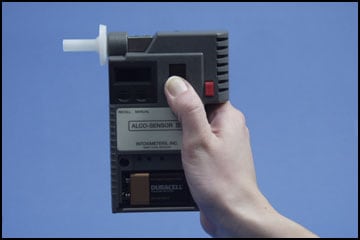
| 14) Eject the mouthpiece from the Alco-Sensor IV by depressing the red mouthpiece eject button. DO NOT pull the mouthpiece out of the Alco-Sensor IV without pressing the red eject button. This could damage the mouthpiece eject mechanism.15) Proceed with a Post Calibration Accuracy Check to verify that the calibration has been successful. | 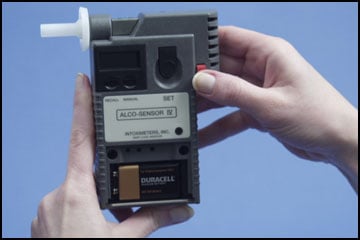 |
| Note: The new calibration setting that was calculated by the Alco-Sensor IV will be stored in memory until another calibration is conducted. | |